Your Blunt Guide to Starting a Fish Tank
7 min read · 2026-10-24
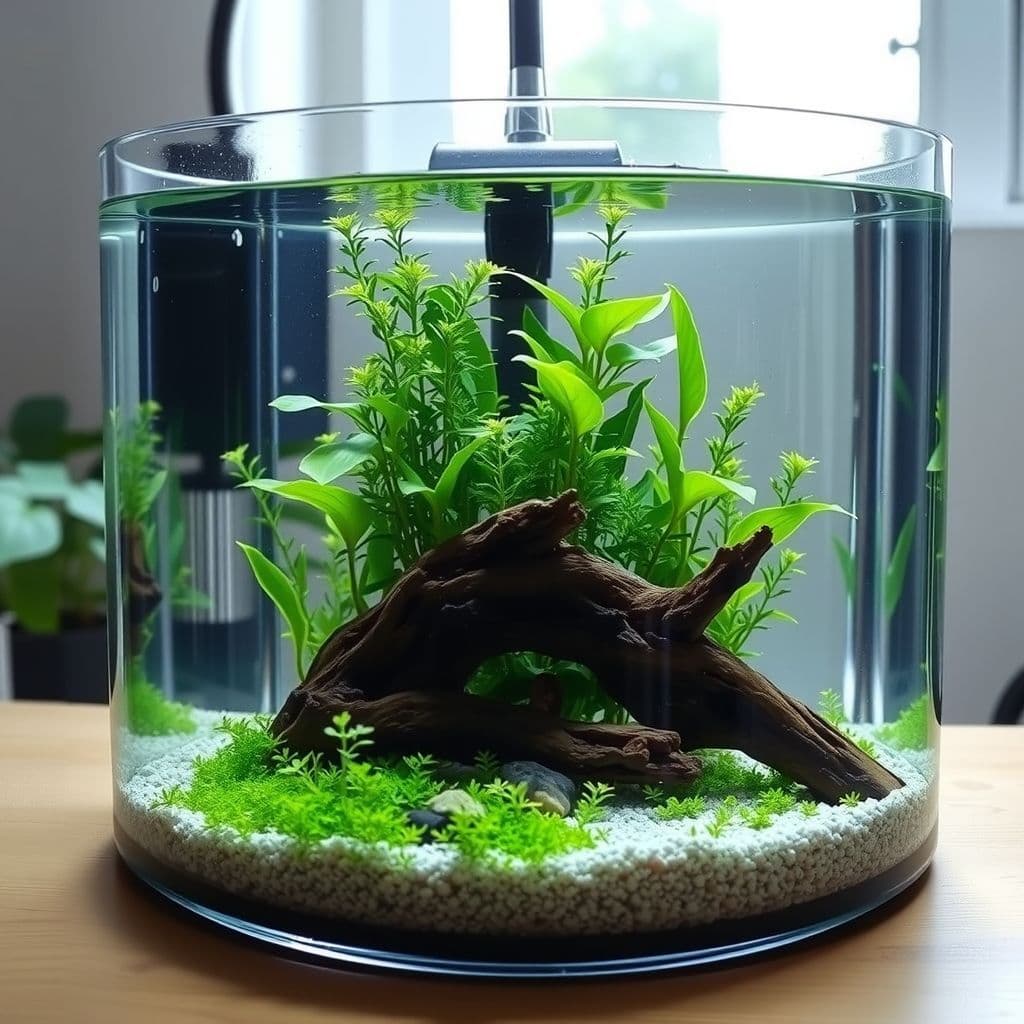
Starting a fish tank demands patience. Not just equipment. The biggest mistake new hobbyists make? Rushing the process, especially adding fish too soon. Understand the nitrogen cycle before buying your first fish.
What Gear Do You Actually Need?
Forget the fancy stuff for now. Focus on core components. Upgrades can wait. The basics are non-negotiable from day one.
The Tank Itself
Go with glass. It resists scratching better than acrylic. Size matters. More than you think. A larger tank, 60 liters or more, provides greater stability. Water parameters fluctuate less in bigger volumes. This protects your livestock. It makes learning and correcting mistakes much easier.
Filtration: Don't Skimp Here
A good filter is vital. It keeps your water clean and clear. It also houses beneficial bacteria, breaking down fish waste. For a beginner planted tank, an internal filter is often enough. The 4-in-1 Internal Filter & Pump at 29.95 USD offers mechanical, chemical, and biological filtration. It's a solid choice. Need cheaper? The Three-in-One Built-In Filter for 9.95 USD is a simpler, more budget-friendly option. Skip the Protein Skimmer, Marine for 184.95 USD. Those are for saltwater. They do nothing for your freshwater setup.
Heater: If You're Going Tropical
Most popular aquarium fish are tropical. They need stable warm water. A submersible heater with an adjustable thermostat is a must. Match its wattage to your tank size. Consult the heater's packaging for guidance.
Lighting: Crucial for Plants
Live plants need decent light. Avoid cheap "kit" lights. They barely grow anything. The Aurora 48 Planted Tank LED Bar costs 72.95 USD. It's a solid choice. This 20 W LED bar has 40 LEDs: 30 white and 10 blue. It's suitable for tanks 48 to 61 cm wide. It even includes a timer. Set it, forget it. For a good head start, consider the Planted Starter Bundle, Light, Tools, Test Kit at 96.95 USD. This bundle includes the Aurora 48 LED, plus tools and test strips. It covers multiple essentials at once.
Substrate: For Your Plants' Roots
This goes on the bottom of your tank. For planted tanks, you have options. An inert gravel or sand is fine if you plan to use root tabs for plant nutrition. A dedicated planted tank substrate, often clay-based, provides nutrients directly to plant roots. Choose based on your plant selection. Layering a nutritious substrate under an inert cap is a common strategy. It's effective.
Water Test Kit: Your Tank's Report Card
This is non-negotiable. You cannot see ammonia, nitrite, or nitrate. Test your water regularly. This is critical during the cycling process. The 8-in-1 test strips included in the Planted Starter Bundle, Light, Tools, Test Kit are a good starting point for monitoring key parameters.
Maintenance Tools: Make Life Easier
- Gravel Cleaner/Siphon: Essential for water changes. It removes waste from your substrate. The USB Siphon Gravel Cleaner V2 for 34.95 USD or the 2-in-1 Gravel Cleaner & Siphon for 36.95 USD are practical choices.
- Fish Net: Move fish safely. A Fine-Mesh Fish Net, Braided Handle for 9.95 USD or a Telescopic Fish Net, Fine Mesh for 12.95 USD works for small fish and shrimp.
- Aquascaping Tools: Planting live plants? A basic set of long tweezers and scissors makes planting and trimming much easier. The Planted Starter Bundle, Light, Tools, Test Kit includes a 5-piece tool set.
CO2 System: Not for Your First Tank
People talk about CO2 injection for plants. Yes, it helps plants grow faster and bigger. But it adds significant complexity and cost. Do not start with CO2. Learn the basics first. You can always add a CO2 Starter Kit - Regulator, Diffuser & Checker for 109.95 USD later. Master the fundamentals. Focus on low-tech plants that thrive without it.
Setting Up Your Tank: Step-by-Step
Once you have all your gear, physical tank setup is straightforward. Take your time. Plan your layout.
- Choose Location: Place your tank on a sturdy, level surface. Keep it away from direct sunlight; this causes excessive algae. Avoid heat sources or vents. They cause temperature fluctuations.
- Rinse Substrate: Wash your chosen substrate thoroughly. Rinse it in a bucket until the water runs clear. This prevents cloudy water later.
- Add Substrate: Place the clean substrate into the empty tank. Create slopes and hills for visual interest.
- Add Hardscape: Position any rocks, driftwood, or other decorations. Arrange them before adding water and plants. This allows easy adjustment.
- Fill with Water: Place a clean plate or plastic bag on top of your substrate. Pour water slowly onto the plate. This avoids disturbing your carefully arranged substrate and hardscape. Fill the tank about two-thirds full. Add a good quality water conditioner. It removes chlorine and chloramines from your tap water.
- Plant Your Plants: It's easier to plant with some water in the tank. Use aquascaping tweezers. Gently place plants into the substrate.
- Install Equipment: Position your filter, heater, and light. Ensure the heater is fully submerged before plugging it in. Plug in your filter and light. Do not turn on the heater until the tank is full. Let the water sit for a bit to equalize temperature first.
- Finish Filling: Fill the tank the rest of the way. Leave an inch or two of space from the top rim.
- Start Equipment: Turn on your filter, heater, and light. Set the heater to your desired temperature (e.g., 24 Celsius for most tropical fish). Set your light timer for 6-8 hours a day initially. This prevents algae.
The Non-Negotiable Step: Cycling Your Tank
This is where most beginners fail. You cannot skip cycling. Your tank needs to grow beneficial bacteria. These convert toxic fish waste into less harmful substances. This process is called the nitrogen cycle.
Ammonia (toxic) → Nitrite (toxic) → Nitrate (less toxic)
Fish produce ammonia. Ammonia converts to nitrite by one type of bacteria. Nitrite then converts to nitrate by another type. Nitrate removes through water changes. Plants also absorb it.
How to Cycle Your Tank (Fishless)
The fishless cycle is the most humane and effective method. It takes patience. Usually 3-6 weeks.
- Add an Ammonia Source: Introduce ammonia. This "feeds" the bacteria. Use pure ammonia from a hardware store (check it contains no surfactants or perfumes). Alternatively, add a small amount of fish food daily. Let it decompose.
- Test Regularly: Use your 8-in-1 test strips. You need to see ammonia rise, then fall. Next, nitrite will rise, then fall. Finally, you should see nitrates present. Ammonia and nitrite must be zero.
- Wait: This is the hard part. Do not add fish. Wait until your tests consistently show 0 ppm ammonia and 0 ppm nitrite for several days, plus some detectable nitrates.
This cycle builds a robust bacterial colony. It handles the waste your fish will produce. Without it, your fish will suffer from ammonia and nitrite poisoning.
Choosing Your First Plants and Fish
Once your tank is cycled, you can start thinking about livestock.
Plants First
This is a planted tank. Aim for easy, low-maintenance plants. Consider species like Java Fern, Anubias, Cryptocorynes, or various stem plants. These do not demand high light or CO2. They help keep the water clean. They absorb nitrates.
Fish Selection
Start with a small group of hardy, peaceful fish. Research each species' adult size, temperature requirements, and social behavior. Do not overcrowd your tank. Buying too many fish too quickly is a common beginner mistake.
- Small schooling fish: Tetras (neon, cardinal), Rasboras, or Guppies are popular choices.
- Bottom dwellers: Corydoras catfish are peaceful. They help clean up uneaten food.
- Single showpiece: A Betta fish can be a beautiful addition to smaller tanks. Be mindful of tank mates, as they can be aggressive.
Add fish slowly. Perhaps 2-3 at a time. Do this over several weeks. This allows your beneficial bacteria to adapt to the increased bioload.
Acclimation
When you bring new fish home, do not just dump them in. Float their bag in your tank for 15-20 minutes. This equalizes temperature. Then, open the bag. Slowly add small amounts of your tank water to the bag over another 30 minutes. This helps them adjust to your water parameters. Gently net them into the tank. Discard the bag water.
Ongoing Maintenance for a Healthy Aquarium
A healthy aquarium receives consistent, routine care. This is not a "set it and forget it" hobby.
- Water Changes: Perform weekly or bi-weekly water changes of 20-30% of your tank volume. This removes nitrates. It replenishes essential minerals. Use your gravel cleaner to siphon out water and detritus from the substrate.
- Water Testing: Continue testing your water weekly, especially for nitrates. This tells you if your water change schedule is adequate.
- Filter Maintenance: Clean your filter media periodically. Rinse sponges in old tank water. Never use tap water; chlorine kills beneficial bacteria. Do not replace all filter media at once. You will crash your cycle.
- Plant Trimming: Trim overgrown plants. Maintain your aquascape. Prevent them from shading out others.
- Feeding: Feed small amounts of high-quality food once or twice a day. Only feed what your fish can consume in a few minutes. Overfeeding pollutes the water.
- Observation: Spend time watching your fish and plants. Learn their normal behavior. Early detection of illness or problems can save your tank.
Quick answers
- How long does it take to set up a new fish tank?
- Physical setup is fast. Cycling your tank takes weeks before you can add fish safely.
- Do I need CO2 for my first planted tank?
- No. Start simple with hardy plants that thrive without injected CO2.
- What's the most important step for a new tank?
- Cycling the tank is non-negotiable. It builds the beneficial bacteria needed to process fish waste.
- Can I add fish right away?
- Never. Adding fish to an uncycled tank leads to suffering and death. Wait until your tank is fully cycled.